
AI-Flow is a tool designed to simplify and automate your AI workflows by connecting various services and tools into a unified flow. This guide will help you get started with AI-Flow, including adding nodes, connecting them, and customizing your workspace for an optimized workflow.
Adding and Connecting Nodes
To build your AI workflow, nodes can be added to the canvas using a simple drag-and-drop interface. Here's a quick overview of how to manage nodes:
- Handles: In AI-Flow, input and output connections are visualized through handles:
- Round handles represent input connections.
- Square handles represent output connections.
- Handle Color Coding:
- Blue input are optional.
- Red input are mandatory and must be connected (or filled) for the node to function.
For some nodes, values can either be entered directly into the field or provided through a handle. If a handle is connected to a field, the input field disappears, leaving only the handle.
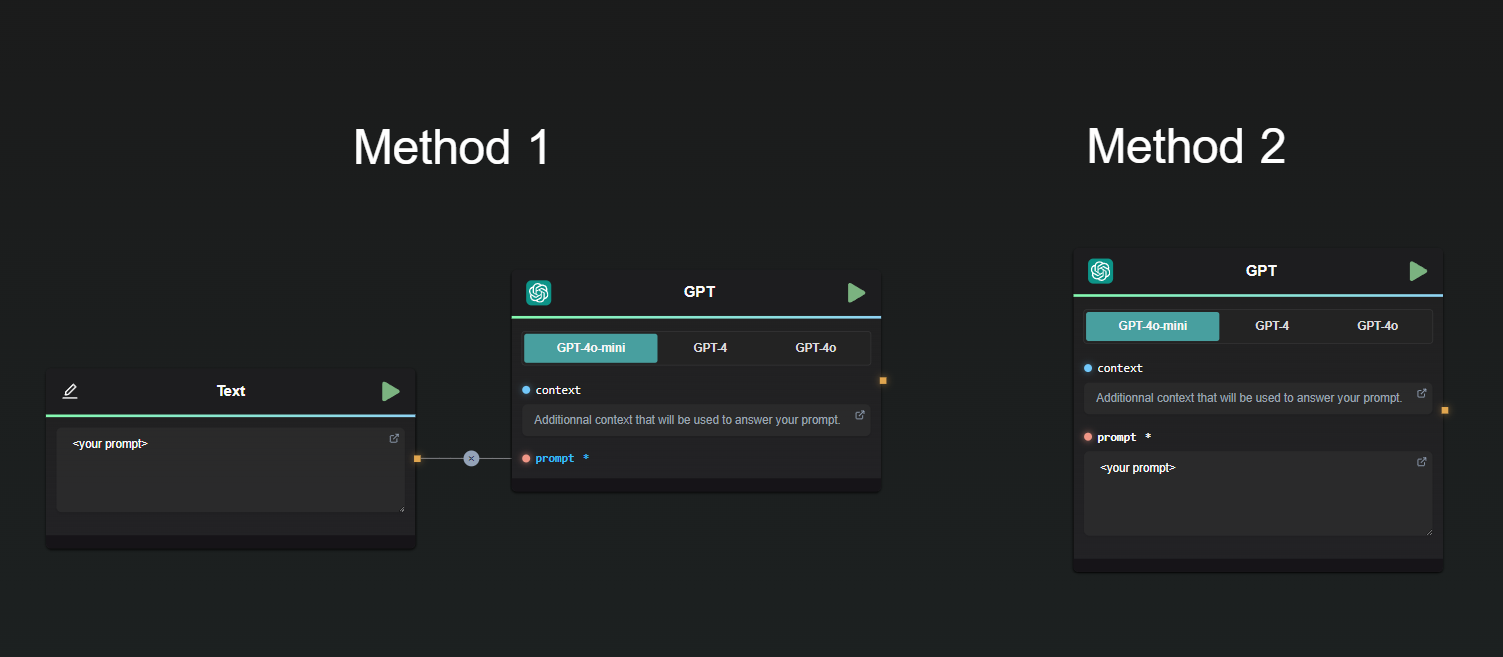
Here’s a basic example:
- Both methods yield the same result.
- The context field is optional, allowing the node to function without it.
- The prompt field is mandatory and must be either filled in or connected to another node.
Types of Nodes
AI-Flow offers a wide variety of nodes to suit different needs. Below is a general overview of the node categories:
- Inputs: Nodes that bring external data into your flow.
- Models: These nodes connect to AI models provided by services such as OpenAI, StabilityAI, and Replicate.
- Tools: Nodes designed to manipulate data and structure your workflow.
- API Builder: These nodes enable your flow to be accessed via API calls. Learn more about this feature in the API Builder documentation.
To dive deeper into the functionality of a specific node, use the help action within the node for detailed descriptions, demos, and related resources.
File Upload Node
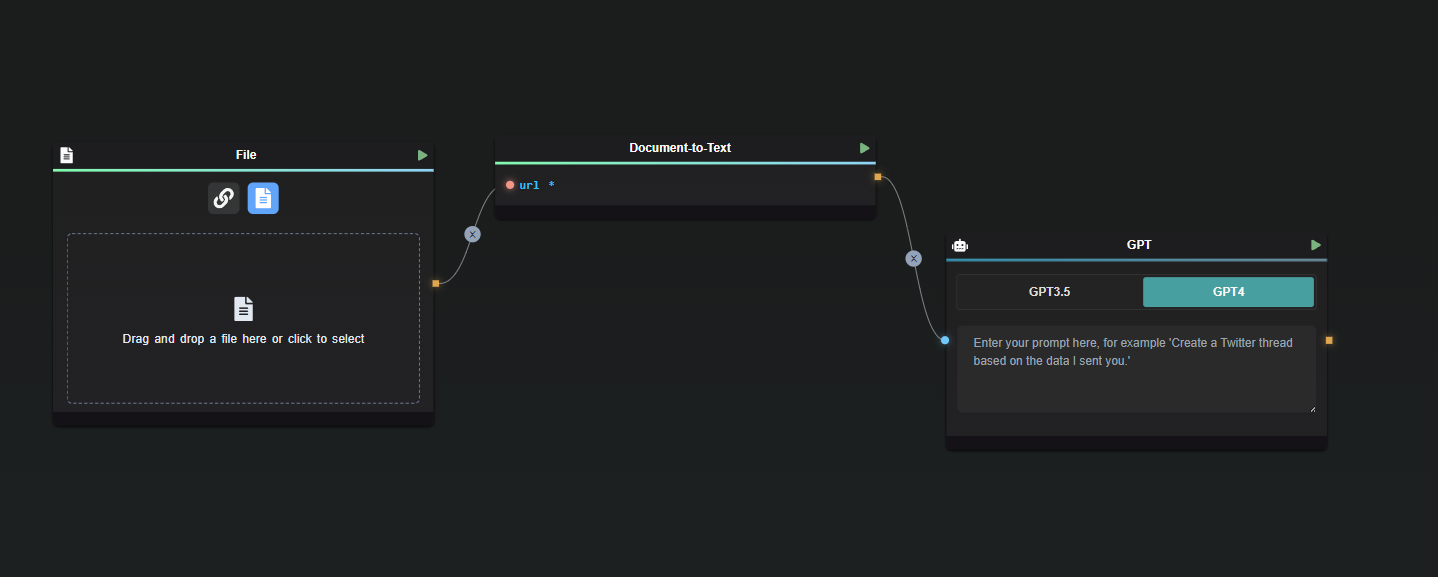
The File Upload node is used to upload a file into the workflow. The node returns a URL that links to the uploaded file.
It's important to note that if you upload a PDF file, the output of the File Upload node will not contain the text content of the PDF itself. To extract the text from the document, follow the upload with a Document-to-Text node, which will process the file and return its text content.
Opening the Right-Side Pane
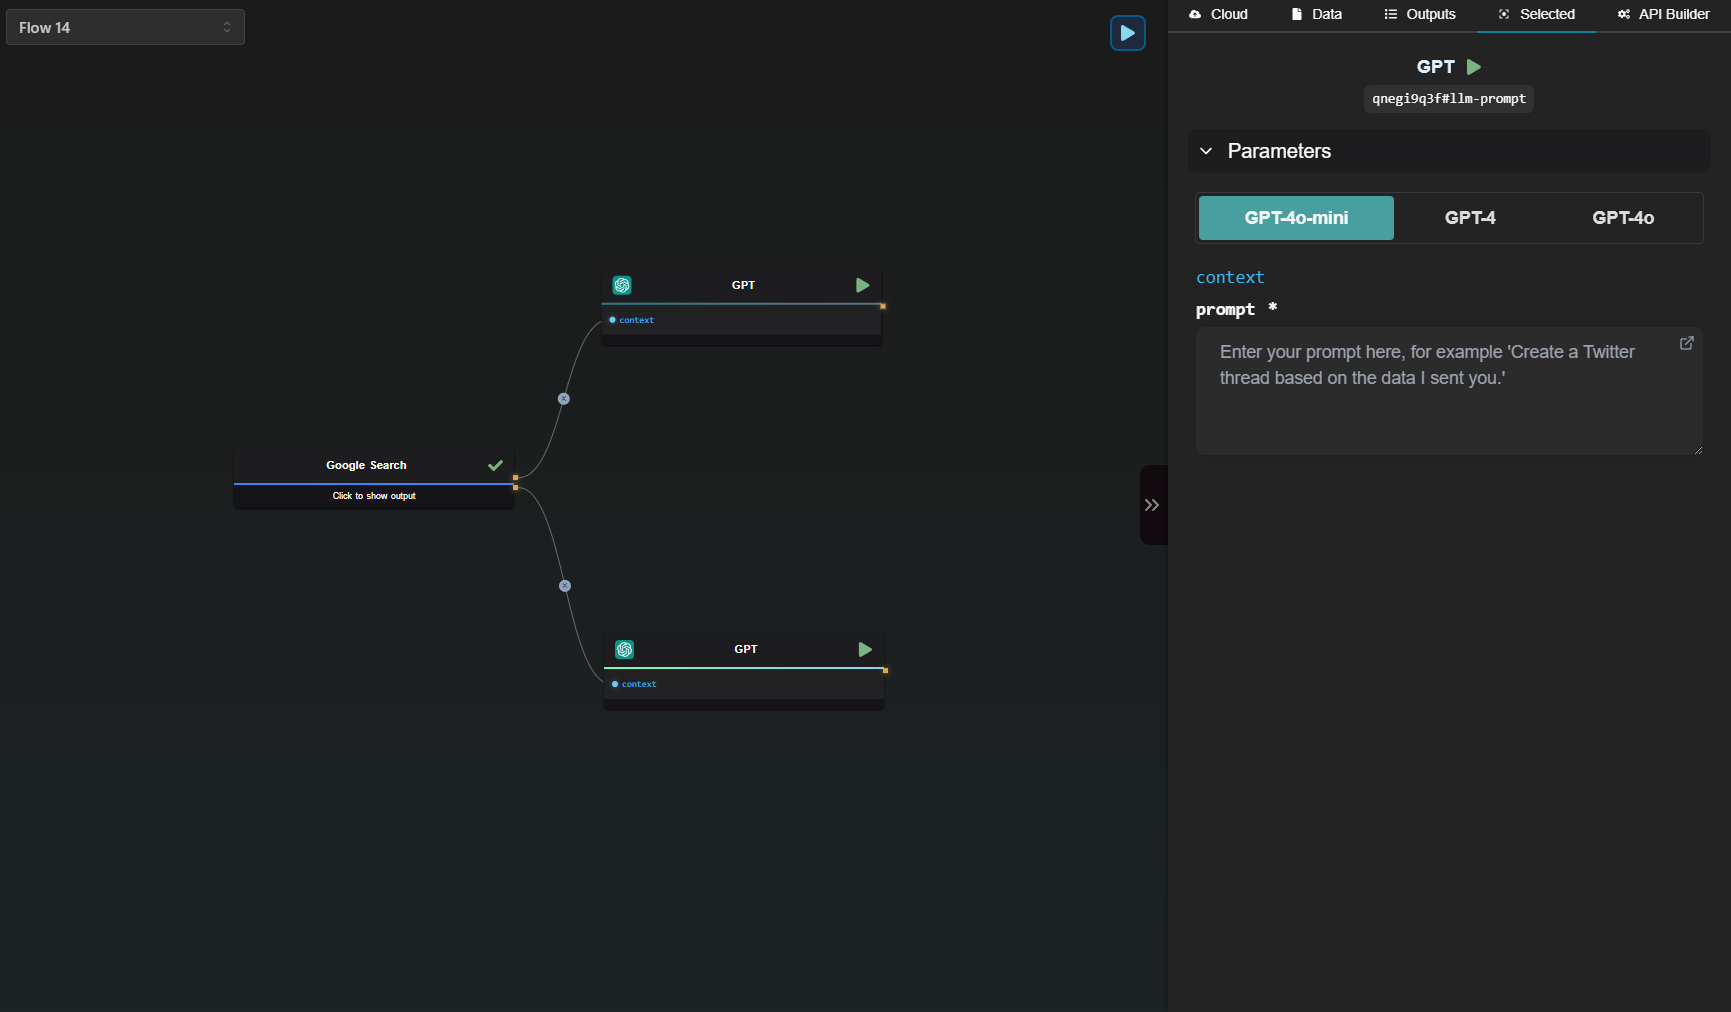
The right-side pane in AI-Flow provides additional functionality to enhance your workflow management. Here’s what you can do when the pane is open:
- View Outputs: See a comprehensive list of all outputs generated by the nodes in your flow.
- Edit Nodes: Directly edit any selected node, even if the node is minimized on the canvas.
- Disable Auto-Save: Choose to disable the automatic cloud save feature if preferred.
- Save and Import Flows: You can save your current flow as a
.jsonfile for future use or import a previously exported flow. - API Management: Manage your API settings and configurations directly from this pane.
This feature is essential for keeping your workflow organized and accessible while providing quick access to critical actions.
Customizing Your Experience
You can tailor the AI-Flow interface to fit your needs:
- Access the settings to customize which nodes are displayed on the app.
- The minimap can be toggled on or off to suit your preference.
Note that new nodes may be added over time but may not appear by default. Stay updated with news on the Home page and adjust your display settings to include any newly added nodes that fit your workflow.
Additional Resources
For more detailed information, refer to the following resources: