
Build and Deploy AI Workflows with AI-Flow
In today's rapidly evolving technological landscape, artificial intelligence (AI) is at the forefront of innovation. However, building custom AI tools often requires integrating multiple AI models or tools, which can be a daunting task, especially for those without extensive coding experience.
AI-Flow is a platform designed to simplify the process of building and deploying AI workflows. With its intuitive drag-and-drop interface, AI-Flow allows users to connect various AI models seamlessly and automate complex tasks with ease. In this article, we'll explore how to build and deploy AI workflows using AI-Flow, highlighting its key features and the API Builder for deployment.
Getting Started with AI-Flow
What is AI-Flow?
AI-Flow is both a platform and an open-source tool that enables users to create custom AI tools through a simple drag-and-drop interface. It supports a wide range of AI models. Whether you're looking to generate images, summarize content, or automate workflows, AI-Flow provides the tools you need to get started quickly and efficiently.
Key Features of AI-Flow
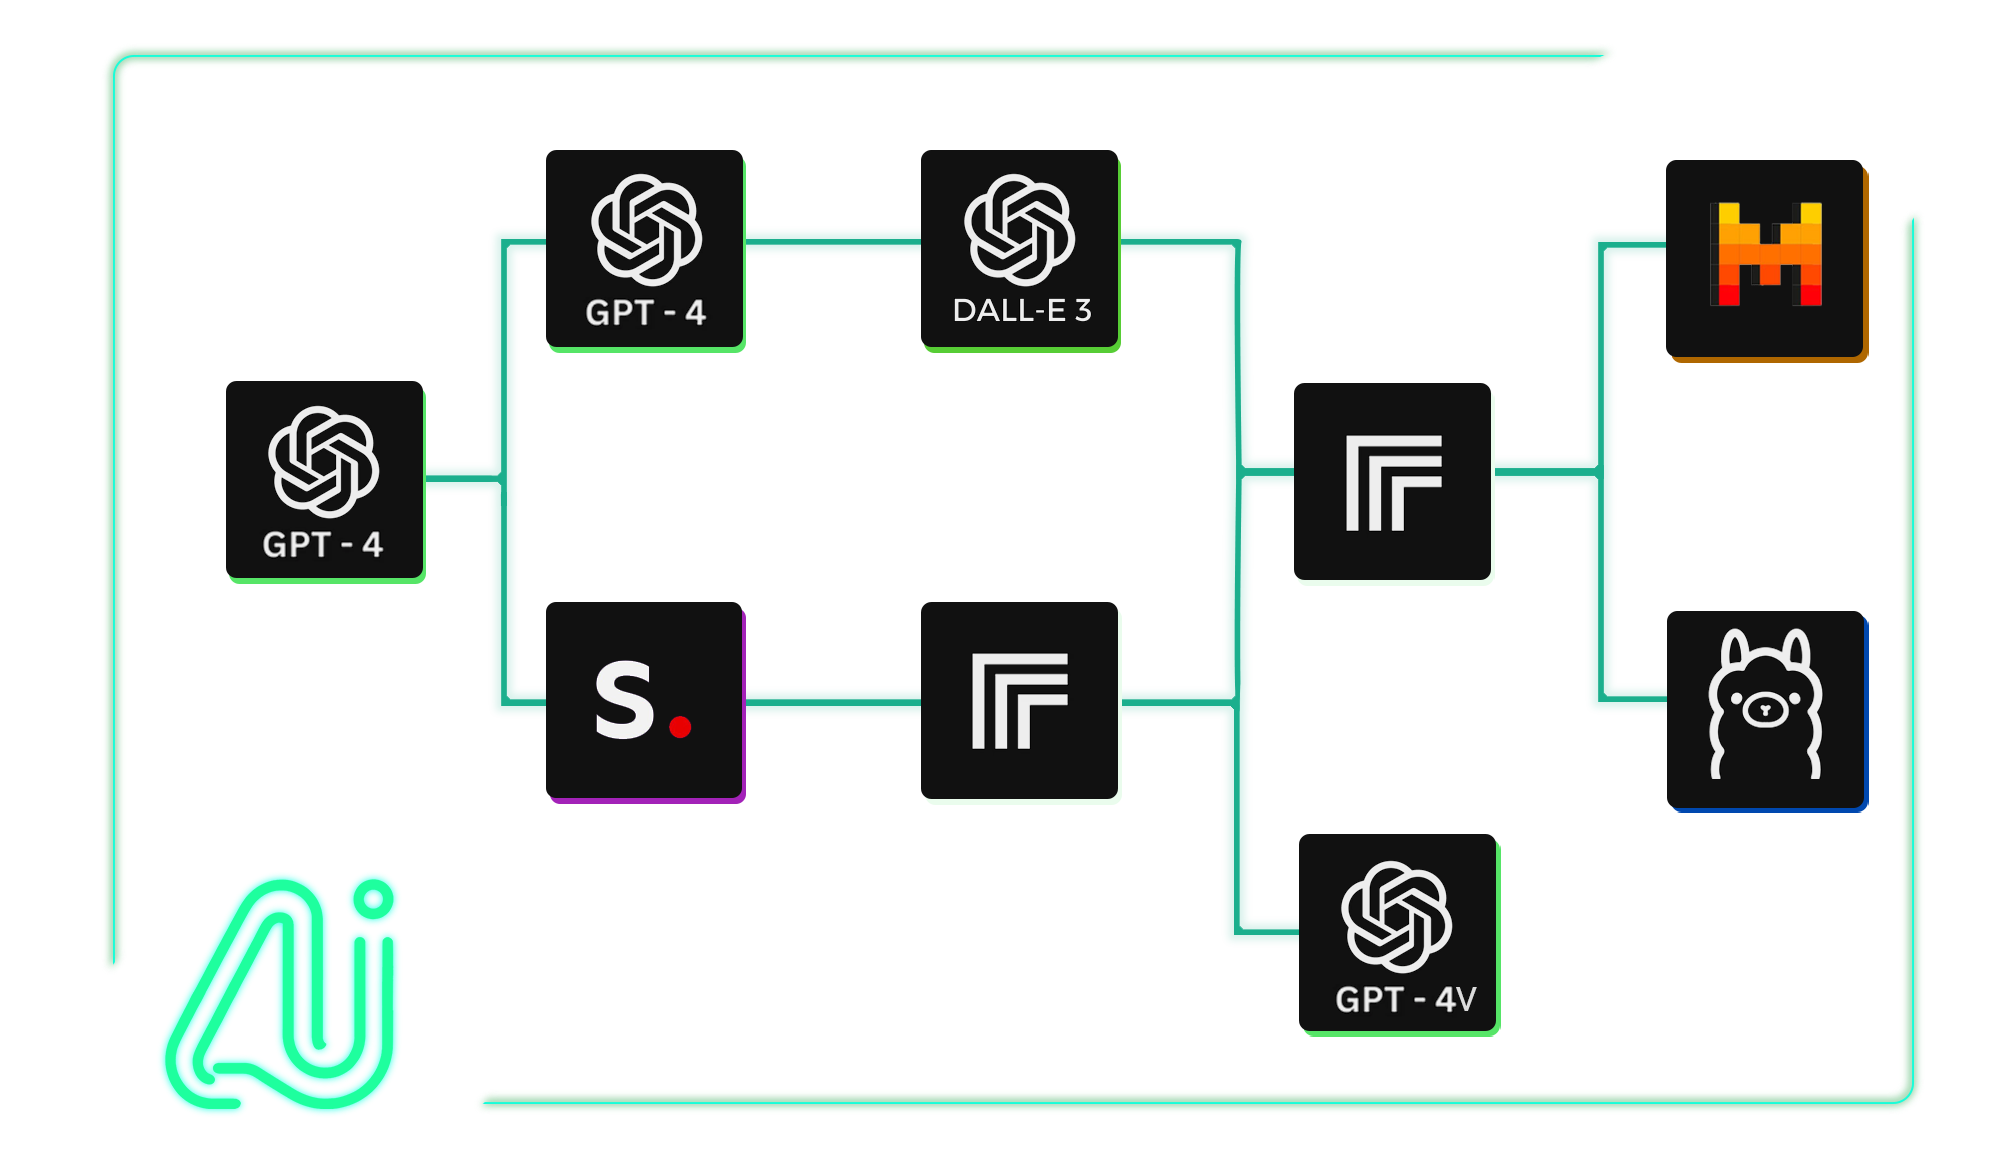
- Integrate Multiple AI Models Seamlessly: Combine AI models like GPT-4, Claude, and all the models hosted on Replicate and StabilityAI, among many others, for innovative outcomes.
- Drag-and-Drop Interface: Create AI tools in minutes without any coding.
- Customizable AI Solutions: Tailor AI solutions to your specific needs, from SEO content creation to image generation.
- API Builder: Automate inputs and retrieve outputs via API requests or webhooks, making it easy to integrate AI workflows into your projects.
Building AI Workflows with AI-Flow
Step 1: Creating Your First Workflow
Once you have AI-Flow set up, you can start creating your first workflow:
- Open the AI-Flow Interface: Launch the AI-Flow application and navigate to the workflow builder.
- Drag and Drop Nodes: Select the AI models you want to use from the available nodes and drag them into the workflow area.
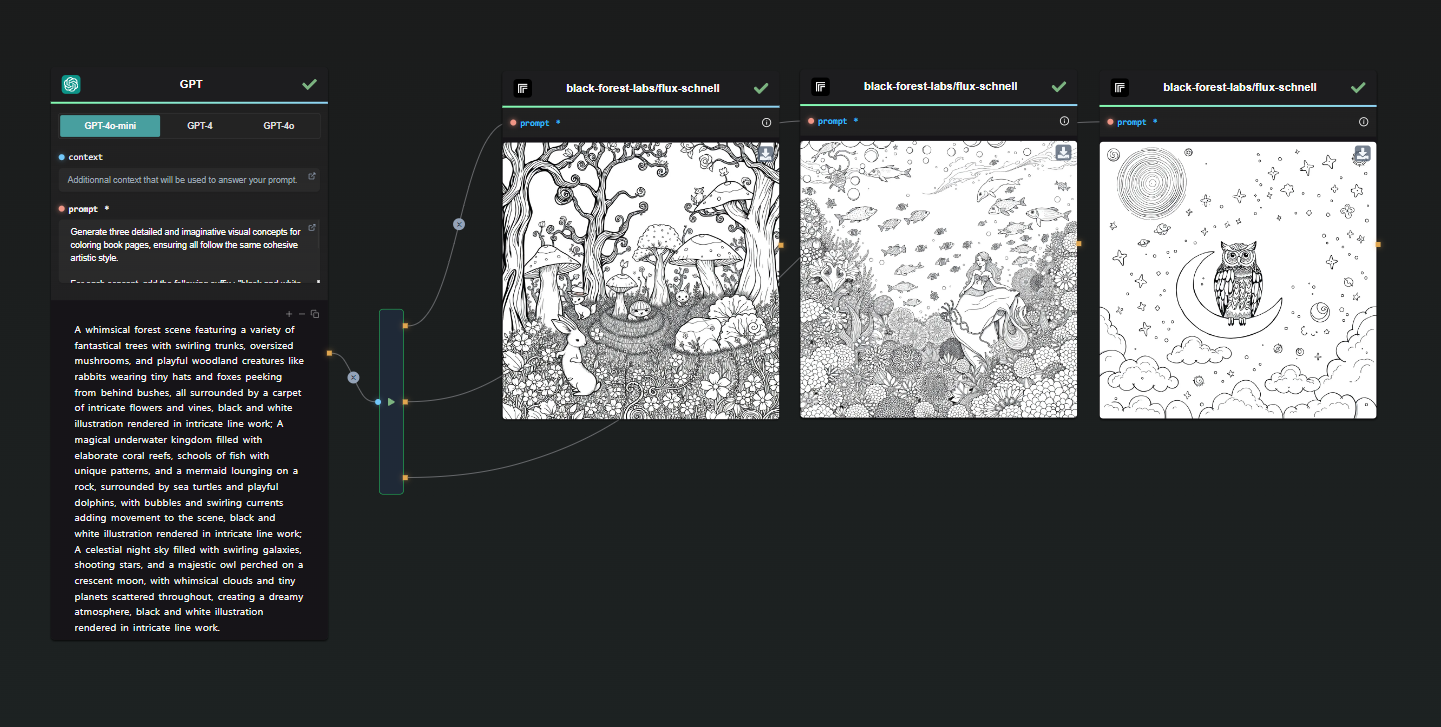
- Connect Nodes: Connect the nodes to define the flow of data between them. For example, you can connect a text generation model like GPT-4o to an image generation model like FLUX Pro.
- Configure Nodes: Customize the parameters for each node to suit your specific requirements. This might include setting prompts for text generation or specifying styles for image creation.
Step 2: Running Your Workflow
- Run the Workflow: Click the "Run" button to execute your workflow within the AI-Flow interface.
- Review Outputs: Check the outputs generated by each node to verify that they meet your expectations.
- Make Adjustments: If necessary, adjust the parameters or connections between nodes to refine your workflow.
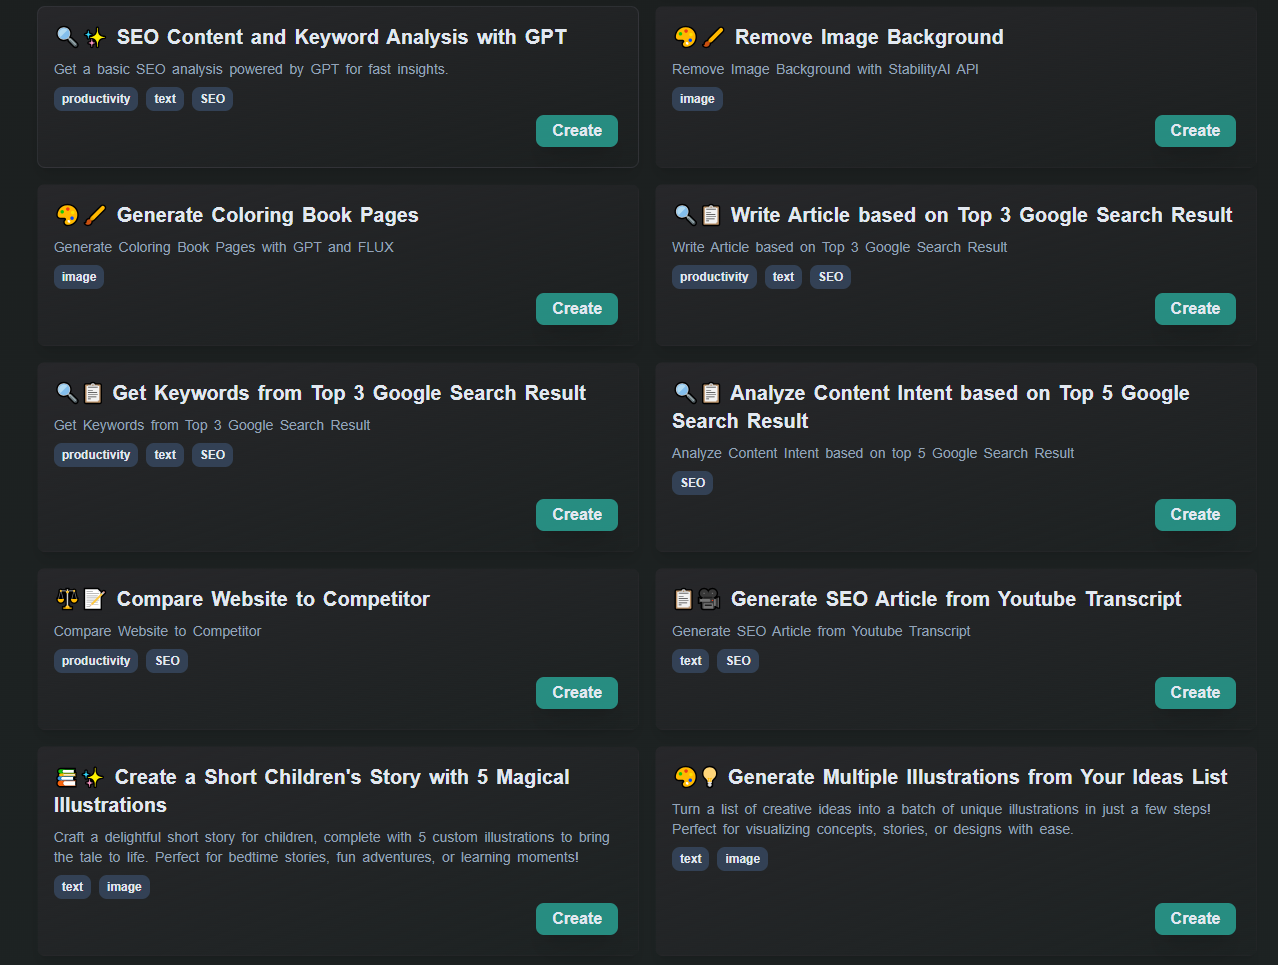
Optional: Start with a Template
AI-Flow comes with various templates, inspired by user feedback. These templates can be easily customized or used as a way to discover the features of the app.
Deploying AI Workflows with the API Builder
This is an optional feature, designed for those looking to integrate their workflow into an external project.
What is the API Builder?
The API Builder is a powerful feature within AI-Flow that allows you to automate inputs, execute workflows with REST API calls, and handle outputs efficiently with webhooks. This makes it easy to integrate your AI-powered workflows into any project, whether it's a web application, mobile app, or backend service.
Step 1: Configuring API Input and Output Nodes
To deploy your workflow via the API Builder, you'll need to use the API Input and Output nodes:
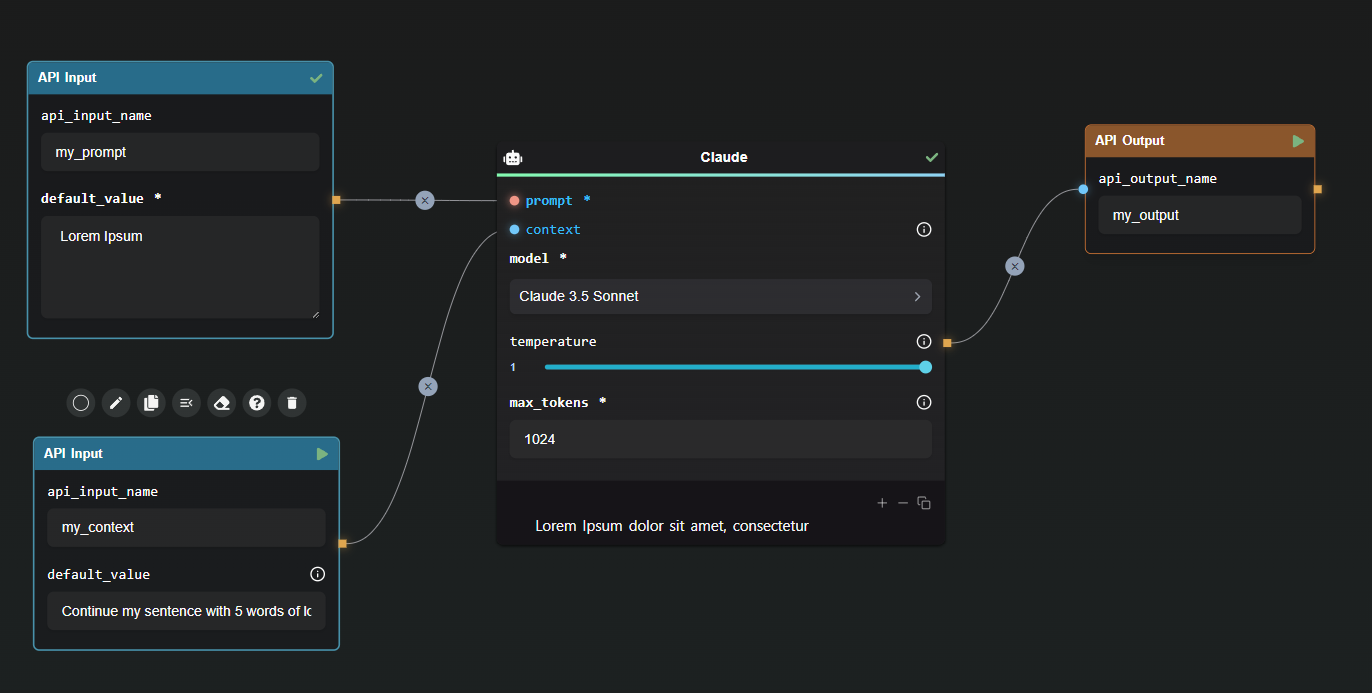
- API Input Node: Define the inputs for your API by mapping each field in the request body to a corresponding API Input node in your workflow. Set default values for optional parameters.

Example Request Body:
{
  "my_prompt": "Lorem Ipsum",
  "my_context": "Lorem Ipsum"
}
- API Output Node: Specify the names of the fields in the final response to ensure the output is structured and understandable.
Example Response:
{
  "my_output": "Lorem Ipsum dolor sit amet, consectetur"
}
Step 2: Generating API Keys
To ensure secure access to your workflow, generate API keys within the API Builder. These keys are essential for authorizing requests and are displayed only once for security purposes.
Step 3: Running Your Workflow via API
With your API keys in hand, you can now run your workflow using REST API calls. The API Builder provides code snippets to help you get started. For example, using cURL:
curl https://api.ai-flow.com/v1/flow/<your_flow_id>/run \
-H "Content-Type: application/json" \
-H "Authorization: Bearer $AI_FLOW_API_KEY" \
-d '{
  "my_prompt": "Lorem Ipsum",
  "my_context": "Continue my sentence with 5 words of lorem ipsum"
}'
This command initiates the flow and returns a run ID to track the process. You can retrieve the results using this ID once the processing is complete.
Step 4: Enhancing Integration with Webhook Nodes
The Webhook Node allows you to send outputs to designated URLs, enabling real-time integration and response handling in your applications. Configure the Webhook Node by specifying the target URL and selecting the outputs to send.
Example Configuration:
{
  "my_output": "Lorem Ipsum dolor sit amet, consectetur"
}
This ensures that structured data is sent to the specified URL, facilitating smooth integration and authentication via custom signatures.
Conclusion
AI-Flow simplifies the way we build and deploy AI workflows by offering an intuitive, no-code platform that simplifies the integration of multiple AI models. With its drag-and-drop interface, customizable solutions, and API Builder, AI-Flow empowers users to create and deploy AI-powered workflows effortlessly. Whether you're a beginner or an expert, AI-Flow provides the tools you need to harness the power of AI and drive innovation in your projects.
Start building your AI workflows today with AI-Flow and experience the ease and efficiency of seamless AI integration. For more information and to get started, visit the AI-Flow Application and explore the comprehensive documentation and resources available.
Additional Resources
For more detailed information, refer to the following resources: